Weeks of preparation came to a plate this past weekend with the official hosting of Pumpkin Tea 2019. The general theme this year was finger foods. It was a move back to english tea party roots. (See this year’s menu: 2019 Pumpkin Tea Menu)
The Pumpkin Tea originated twenty plus years ago as a tea and group pumpkin carving. It evolved over the years to be more about the tea and less about Halloween.
Turkey and Lingonberry
Ham and Cheese
Curry Chicken Salad
When we moved to La Pine the tea got restarted and became a day of celebratory feasting on baked goods. Then last year we included an “insta-pot-luck” … because there wasn’t enough to eat as it was(just joking).
We enjoy the time to catch up with family, share summer adventure news, and of course… play some cards.
Heavy cream whipped to a fluffy mound might be one of the best accompaniments to any baked good.
Now take that and add natural essence and freeze dried fruit and it gets even better.
I grew up spooning heavy cream over fresh berries and even chocolate cake, so a bowl of whipped cream isn’t something new. That said, adding flavors other than vanilla is.
Chocolate
Raspberry
Mango
Lemon
Vanilla
Our first experiment into flavored whipped cream started with chocolate. We added King Arthur Triple Chocolate Cocoa Blend with a dab of chocolate extract. Wow!
Puffed up with success, we moved on to raspberry whipped cream. Heavy cream whipped with freeze dried raspberry powder, raspberry essential oils and a touch of red food powder proved to be delicious. We were hooked.
From there we mixed up mango, then lemon, and of course traditional vanilla. Our plan…to use these creams as toppings with fresh fruit, and paired with slices of almond cake and hand-molded shortbread tarts. More on that on our upcoming Pumpkin Tea post.
Chocolate Whipped Cream - Use Basic Whip Cream recipe
1TBcocoa powderKing Arthur Triple Cocoa Blend
1/2tsp chocolate extract substitute chocolate extract for vanilla extract
Raspberry Whipped Cream - Use Basic Whip Cream recipe
1TBpowdered freeze dried raspberries
1/2tspraspberry extractsubstitute raspberry extract for vanilla extract
Mango Whipped Cream - Use Basic Whip Cream recipe
1TBpowdered freeze dried mango
1/2tspmango extractsubstitute mango extract for vanilla extract
Lemon Whipped Cream - Use Basic Whip Cream recipe
1TBlemon juice powderKing Arthur Lemon Juice Powder
1/2tsplemon extractsubstitute lemon extract for vanilla extract
Instructions
Start with cold heavy cream. The colder the cream, the easier and more successful it will whip. You can even chill the mixing bowl in the refrigerator before you start.
Whip the heavy cream, sugar and extract together on medium-high speed. This should only take a few a couple of minutes. Whip until it has a billowy, smooth texture.
NOTE: To add different flavors, beat cream until soft peaks form. Then add extracts and/or other flavorings. Beat until stiff peaks form.
Explained in an earlier post, the expanse of land between home and western Montana is too much for a day’s drive and also a bit formidable in the blast of summer’s heat. Any route includes several hundred miles of desert driving through either Idaho or Nevada and eastern Oregon.
At the end of a week long tour we’d found ourselves on the western edge of Wyoming and looking at a two day drive home which would include a trip to the moon, well nearly.
Few places on earth offer a more barren landscape than Craters of the Moon scenic monument. This expanse of lava flow, cinder cones and sage brush sits in the middle of southern Idaho. US 20 runs along the northern border so it was more or less on our way.
From our camp site in Wyoming’s Teton Mountains, we were half a day’s drive of the National Monument. The plan was to enjoy a visit before the heat of the day bore down on us. Then press on to the Oregon border and a hotel stay to avoid the nearly 100 degree temperature.
There is a loop drive through the park offering lots of different angles on the unique landscape.
On a cooler day we might have walked one of the trails or even stayed the night in the moonscape campground. Worth the effort as it is a strangely beautiful spot. But it doesn’t have much to offer in the way of shade from an August sun.
Today we flavored, colored and whipped half a dozen different types of heavy cream, dumped a dozen macarons that were an odd blue color and made buttercream that was way too sweet.
For the past few weeks our kitchen has remained in a constant state of disarray. We are in the process of settling a menu for our Pumpkin Tea. Every fall we host an english tea party, a tradition that goes back to when our dining room couldn’t really seat all the people waiting to sip tea and butter scones.
I’m really not sure who christened it Pumpkin Tea, but this party recently started back up again. Usually mid to late September our house hosts a party generating a few dozen different baked goods and tables of goodies.
Freeze dried raspberries
Powdered in processor
Raspberry Whip Cream…Yumm!
The crux of the event from our prospective is being able to try a lot of different baking techniques and recipes without eating too many calories. Of course too many calories is a relative term, but with Pumpkin Tea we get to play with a wide range of methods and flavors.
This year we are doing more traditional english tea party fare.
Think … finger sandwiches, tea cakes and tarts. There is also an almond cake with a variety of flavored creams and fresh berries as toppings.
One year we made four different cakes to find the right flavor and texture.
This year we went through several batches of macarons, realizing how hard it is to get those cookies consistently right.
Tea cake with Fiori di Sicilia extract (vanilla, orange and floral notes)
French macaron, nice foot, smooth top
Over the course of a month the menu expands, contracts and shifts as the testing points out items that may be tasty but require too much work. It also presents bakes that never seem to work out.
However, in the end we have a party spread and lots of good tastes … and we hope a good time is had by all.
20 years ago I read a book that focused on the roads less traveled. William Least Heat-Moon wrote Blue Highways in 1999 and we’re acolytes of his travel philosophy. The blue highways have become single red and black lines on current maps, but we seek them out just the same.
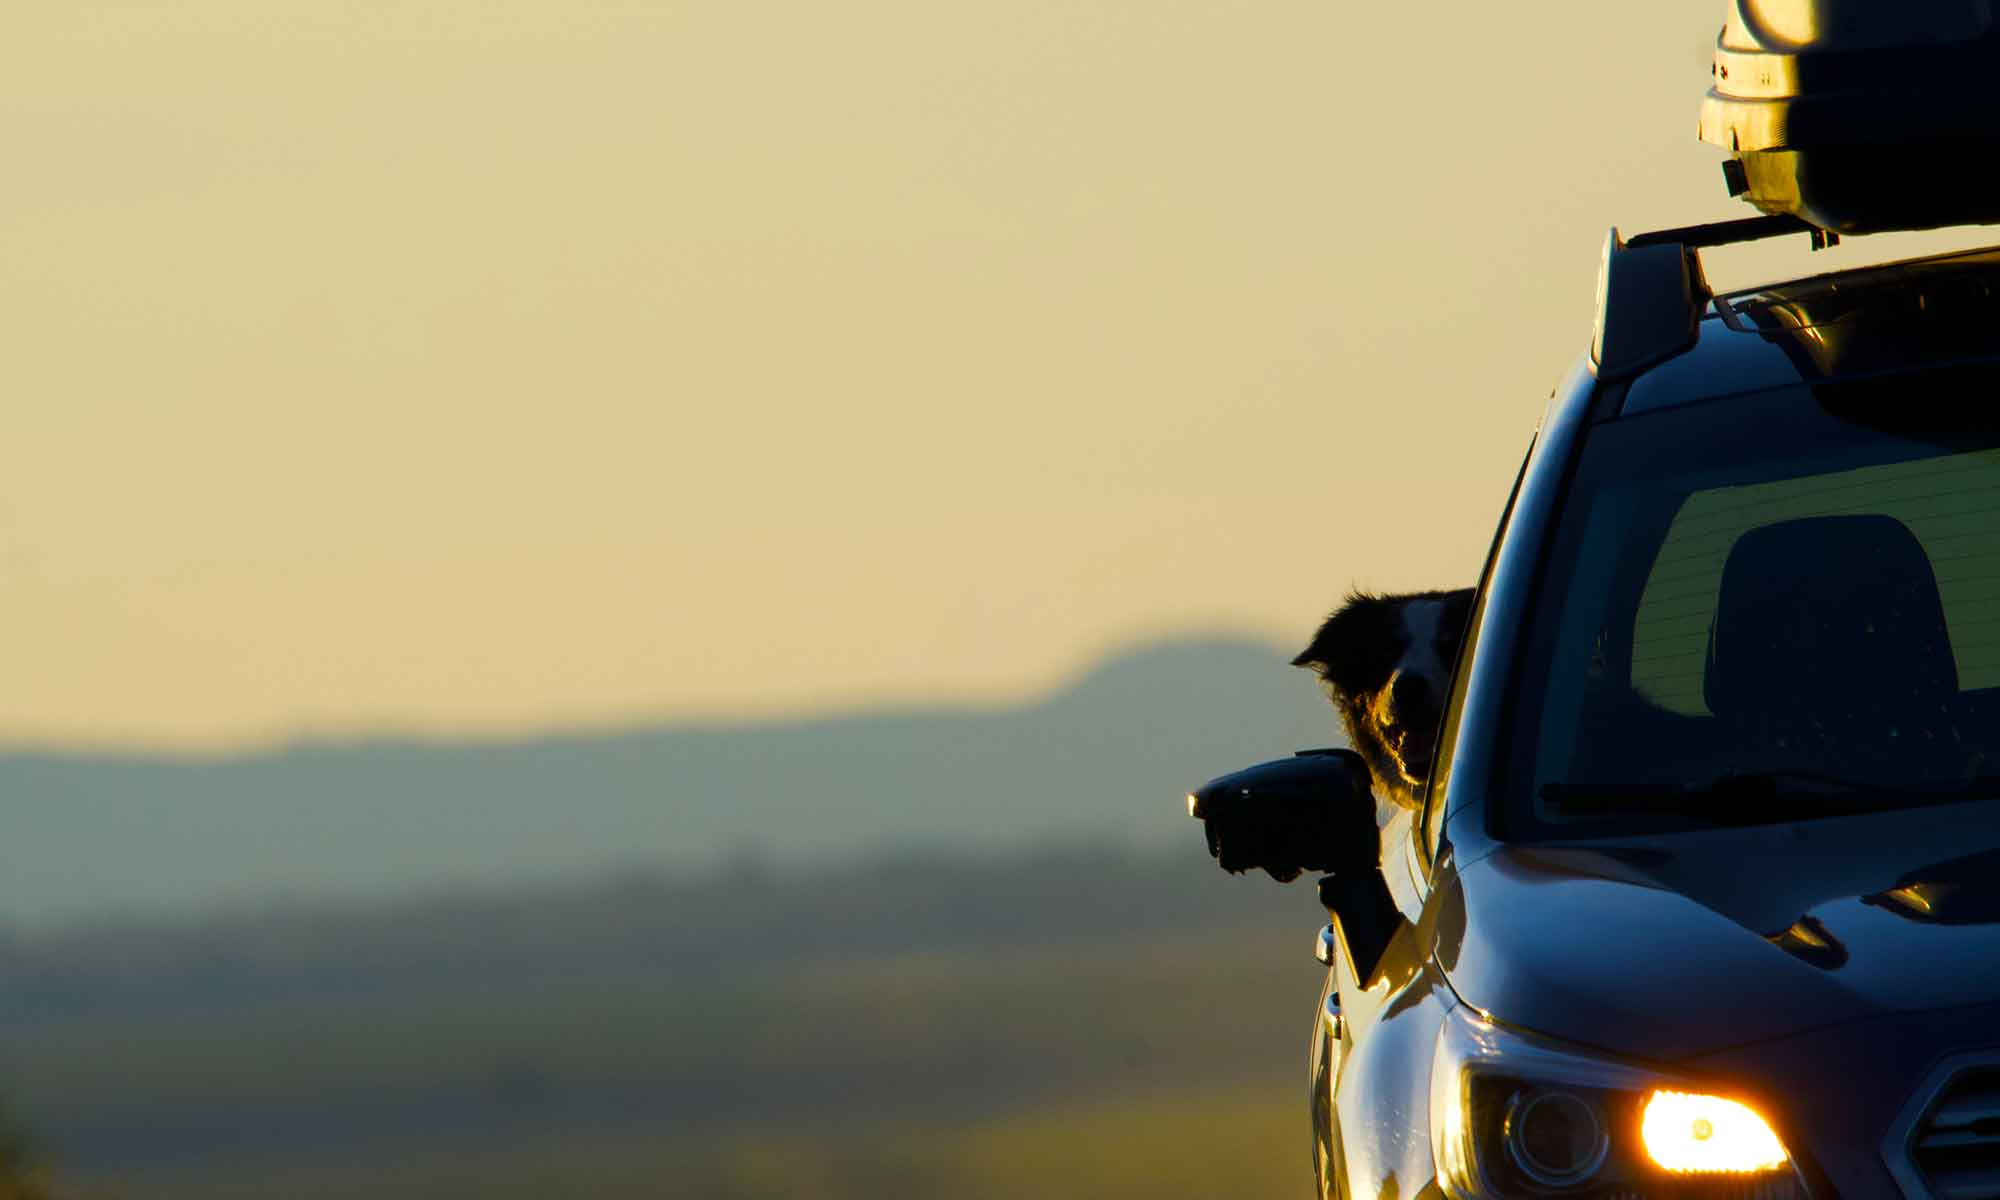
A recent road trip was meant, primarily, as a shakedown for the Eurovan and us as campers. To date our “vanlife’ has been overnight fishing trips. Now, we are going to be on the road for a week or more.
This type of excursion involves a great deal more drive time. The first two days were spent just getting to our major destination … Montana. In all that driving JQ developed a ninja-like prowess for snapping pictures from the van’s windows.
A wealth of images were found speeding along the highways from Oregon through Idaho, into Montana and Wyoming. Thats not to say we didn’t take advantage of scenic overlooks, historical markers and other roadside stops. But from the window of her camper, JQ gathered a rather nice collection of the sights along the red & black highways.


 Heavy cream whipped to a fluffy mound might be one of the best accompaniments to any baked good.


 From there we mixed up mango, then lemon, and of course traditional vanilla. Our plan…to use these creams as toppings with fresh fruit, and paired with slices of almond cake and hand-molded shortbread tarts. More on that on our upcoming Pumpkin Tea post.
 Explained in an earlier post, the expanse of land between home and western Montana is too much for a day’s drive and also a bit formidable in the blast of summer’s heat. Any route includes several hundred miles of desert driving through either Idaho or Nevada and eastern Oregon.
 Few places on earth offer a more barren landscape than


 There is a loop drive through the park offering lots of different angles on the unique landscape.


 This year we are doing more traditional english tea party fare.
 One year we made four different cakes to find the right flavor and texture.


 A recent road trip was meant, primarily, as a shakedown for the Eurovan and us as campers. To date our “vanlife’ has been overnight fishing trips. Now, we are going to be on the road for a week or more.


